
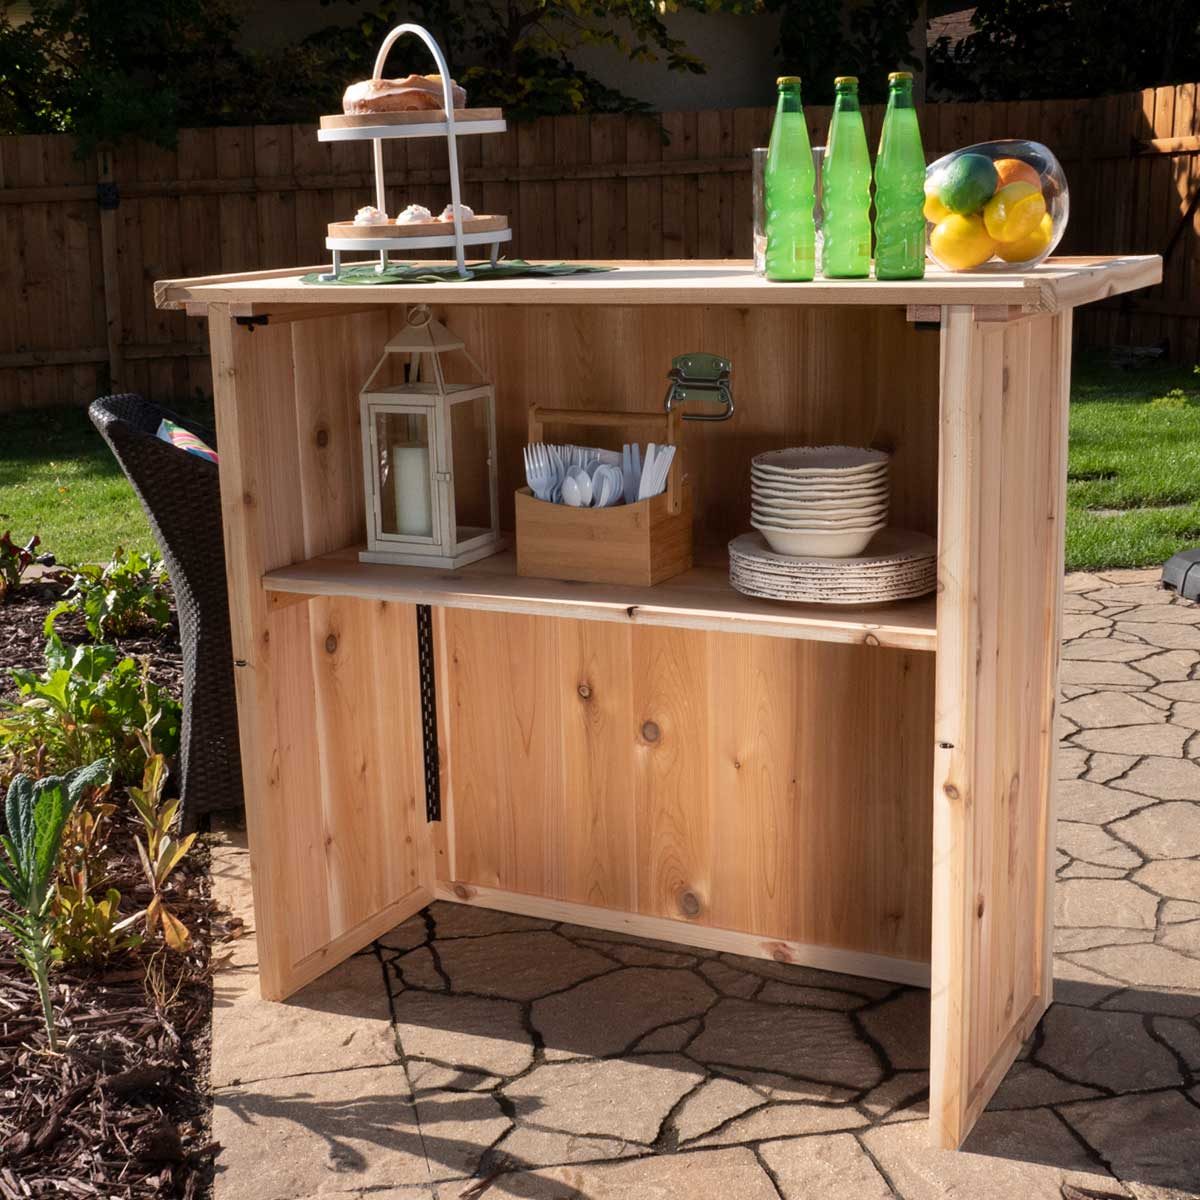
No good tailgating or backyard setup is complete without a solid bar. Build this folding, portable version in one day!
Introduction
This folding outdoor bar is a really fun project to build. It tests your ability to complete to cut different width grooves and matching the grooves to board thickness. It challenges your notch-cutting prowess. It expands your knowledge about different ways to glue up boards. But when you are finished, it might be the most satisfying project to put together and showoff. We bought 7/8-in. thick cedar and milled it down to the 3/4 in., but you can use any 3/4 in. thick material to complete the folding bar.
Tools Required
- Clamps
- dado stack
- Drill/driver
- Flexible putty knife
- Jigsaw
- Miter saw
- Table saw
Materials Required
- 1-1/2” x 30” Continuous hinge (2)
- 1-1/4” brad nails
- 1” screws
- 1×2 cedar
- 1×6 cedar
- 2” barrel bolt
- 2×2 cedar
- 3-1/2” chest handle
- Exterior wood glue
- Screw eye
- Wood putty
Cutting List

Project Plans

Step 1 – Cut the shiplap boards
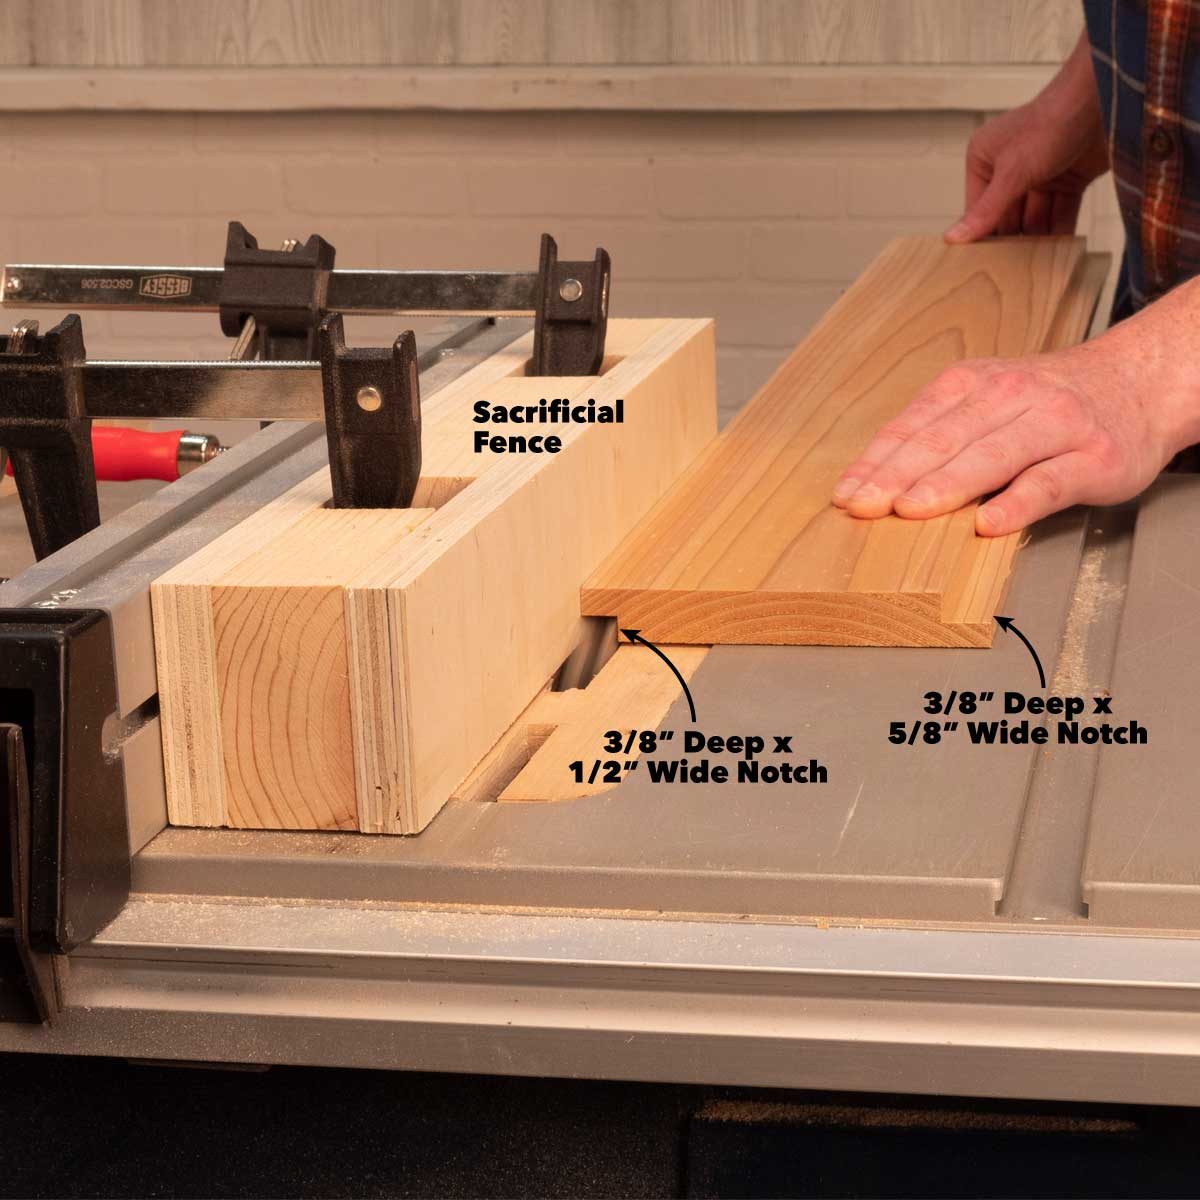
Cut the 1×6 cedar to 39-in. on the miter saw. Clamp a sacrificial board to the table saw fence. Cut a 3/8” deep x 5/8” wide rabbet into the edge of the 1×6 cedar on the table saw. Flip the board over and cut a 3/8” deep x 1/2” wide rabbet on the table saw. Note: Three of the boards don’t need the 3/8” deep x 5/8” wide rabbet for one edge of the panels and three of the boards don’t need the 3/8” deep x 1/2” wide rabbet for the other edge of the panel.
Step3 – Build the panels

Tape one face of scrap boards, cut to the width of each panel, with packing tape to make clamping cauls. Glue the 1/2” wide rabbets and align the boards. Clamp the cauls on the top and bottom of each end of the glue-up to keep the boards in place. Cut a 3/4-in. wide x 3/4-in. deep. groove into the center of the 2×2 boards with the table saw. Cut the 2×2 edging (B, C and D) to length on the miter saw. Spread glue into the grooves of the 2×2 parts and set them in place. Secure the edging with 1-1/4 in. brad nails.
Step 3 – Cut and add hinge mounts and cleats
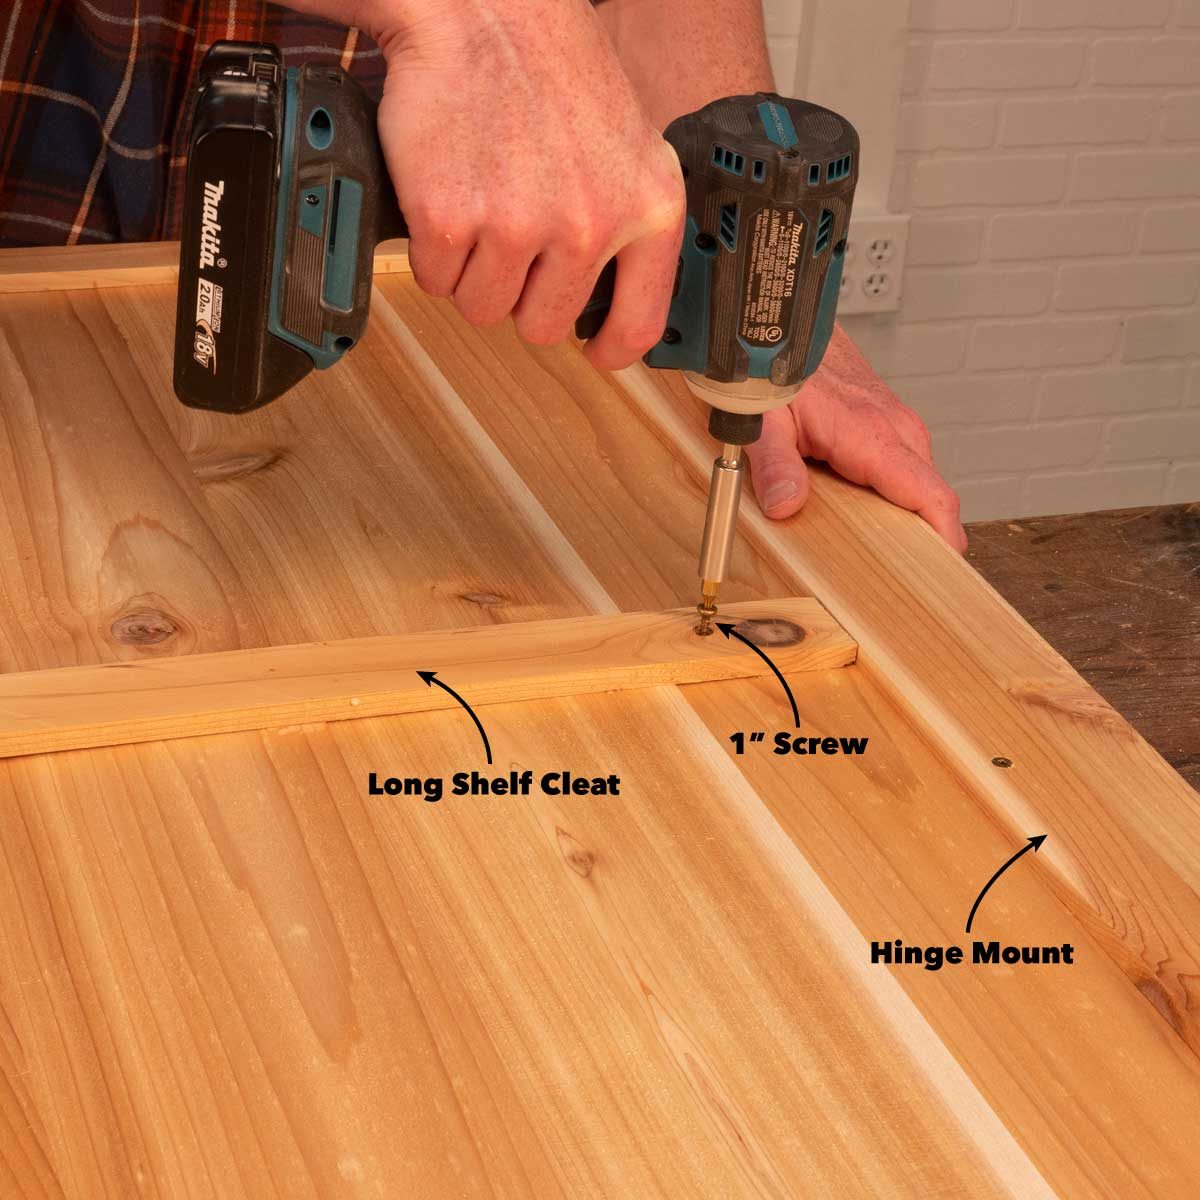
Crosscut the 1×2 board to length on the miter saw for the hinge mounts (K) and shelf cleats (L and M). Resaw the 1×2 boards to 3/8 in. thick on the table saw. Using a sacrificial push stick and feather board makes this step much safer. Glue the hinge mounts in place. Drill pilot holes and countersink and fasten with 1-in. screws. Measure 16 in. from the top of the panels. Glue the shelf cleats to the panels so the top edge matches the marks. Drill pilot holes and countersink and fasten with 1-in. screws.
Step 4 – Attach the side panels to the front

Clamp the side panels to the backside of the front panel’s side edging at a 90-degree angle. Set the continuous hinges on the inner side of the assembly. Drill pilot holes and fasten the hinge in place with the included screws to make the bar wall.
Continue to Steps 5-8

